In today’s post, I am going to show you how you can use Amazon’s SageMaker to classify images from the CIFAR-10 dataset using Keras with MXNet backend. For this tutorial, you do not need the GPU version of Tensorflow.
This tutorial is a continuation of my previous one, Convolutional NN with Keras Tensorflow on CIFAR-10 Dataset, Image Classification and you can find it here. Please, make some time and take a quick look at the article and also download the code (IPython notebook) because you will need it.
The sections we will cove are the following:
- Prepare DockerFile for GPU container
- Creating the keras.json file
- Creating the python file with our model, cifar_10_keras.py
- Set up SageMaker to run our Model
- Save the model to use for predictions
Setup SageMaker and the environment
There is an amazing post from Julien Simon (@julsimon) that explains how to use SageMaker with MXNet-Keras and run your custom code. You can find his article here.
We are going to use the same method to deploy our model and train it in a powerful machine. You can find all files and code that I am going to use here.
Prepare DockerFile for GPU container
We are installing all the appropriate packages in order to have an image to run our model in GPU
- nvidia/cuda:9.0-runtime: Builds a container with Ubuntu xenial and cuda9 already installed
- installing all the necessary packages for the os (including python3 and (libopencv-dev)
- Moving the files (keras.json and cifar_10_keras.py) in the Docker container
- installing mxnet-cu90 and keras-mxnet in order to have keras with backend MXNet and able to run on GPU
Creating the keras.json file
The important variables here are `image_data` and `backend`.
- image_data: channels_last means we have our data in the following format (32, 32, 3) that means an image 32×32 with 3 channels of color (RGB) if our data was in the format (3, 32, 32) that means we have the channels of color (RGB) are first and then the image 32×32
- backend: is the backend of Keras, in our case is MXNet
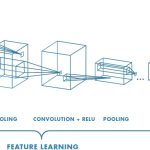
Creating the python file with our model, cifar_10_keras.py
You can find the complete file here. But let’s dig more into it. First, we have to load the data, in a similar manner as we did in the first chapter.
Then we have to open the parameters for our model, specified by the estimator.
Then we do the same things as we did when we created the model in the previous tutorial
- Load the data from the pickled files (we use the load_data() function)
- Preprocess the data
- Create the model
- Augment the images
- Compile the model
- Train the model and save it
And we are done creating the model for SageMaker. Now we are going to set up the SageMaker to run our custom model.
Set up SageMaker to run our Model
We will go step by step. You can find the Jupyter notebook with the whole code here.
- Download dataset and save it as pickle
- Create the Docker image with our custom model
- Upload dataset to S3
- Train the algorithm
- Get the saved model
1. Download dataset and save it as pickle
It is the same code as we did in the first section, the only that changes are that we are downloading the dataset in SageMaker’s EBS now and we have to save the pickled file to specific folders as we did last time.
- data/train/: here we save train-x and train-y files
- data/validation/: here we save test-x and test-y files
2. Create the Docker image with our custom model
First, we have to log in to ECR and create a repository. Before advancing to this step make sure you have an ECR up and running with the same name as in the variable repo_name. If you encounter an authentication error, make sure you have given the appropriate access to the repository.
Then we move the files that we want to a folder called build/ and then we build the Docker image. When the image is done, we push it to ECR.
3. Upload dataset to S3
We upload the dataset we created earlier in step1.
4. Train the model
To train the model we call SageMaker’s Estimator with the image we just built, and input data the ones that we just created.
5. Get the saved model
You can find your saved model, compressed, in your S3 bucket. You can download it, load it to your algorithm and start predicting!
If you want a tutorial on how to set up your account for SageMaker, please let me know in the comment section below or you can tweet to me @siaterliskonsta.
That’s it for today! I know that I raised some questions about SageMaker, but be sure I will upload many more tutorials! Any questions you have you can find me on Twitter @siaterliskonsta, I would love to hear them and I will do my best to answer them! The following SageMaker post will be way simpler! We will use the AWS’s algorithms! Till next time, take care and bye bye!